Pizza Equipment
Pizza making requires a little investment, especially the stand mixer and baking stone. Of the two you can't live without the stone. I've pounded a few dough balls out by hand; which is why we own a stand mixer. Hand mixing and kneading is do-able. But, make a dough ball once or twice by hand and you'll see the wisdom of the stand mixer. The baking stone, on the other hand, is essential. And, when I say baking stone, I mean a full oven-sized stone. Those 14-inch round frozen pie re-heaters don't cut it. Bear in mind that a "from-scratch" pizza is assembled with raw floppy dough shaken off a pizza peel. The chances of a perfect toss from peel to one of those tiny round stones is about as likely as the Cubs winning the next five pennants in a row. So, unless you are an ex-space shuttle docking specialist, buy the stone.
|
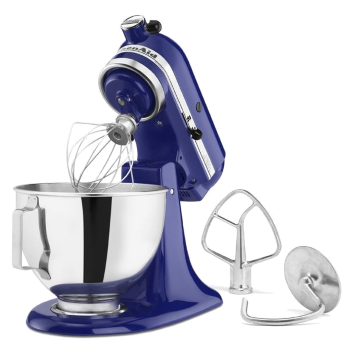
Stand Mixer (Cost: $250-400)This is the budget breaker. Sorry, but consider the fact that we bought ours nearly 30 years ago and use it at least weekly. That spreads the cost pretty thin. You don't need a Hobart commercial mixer (circa $3500) for dough making. We use a lower-end KitchenAid. It does an excellent job without complaint. The important issue here is the mixer should have a good dough hook and enough power to handle heavy dough. Anything I've seen under $250 struggles with that task. |
|
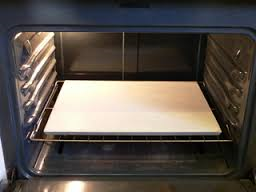
Baking Stone (Cost: $60-95)Our stone is 22 x 16 inches and fits perfectly in our standard 30 inch range/oven. We leave it in the oven continuously except for the occasional "self-cleaning" cycle. It doesn't interfere with other baking uses. Front-to-back fit is most important. If you want to cheat and buy a smaller stone, take off a couple inches on the sides. Obviously you need to close the door, so heed the old adage measure twice and cut once. But, in this case, let someone else do the cutting. Custom cut stones are available from California Pizza Stones for less than $80 which includes shipping. |
|
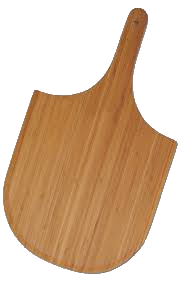
Pizza Peel (Cost: $15-30)We use two peels. One is our "good" one for building and tossing the pie. The second (cheaper) one is used to remove the pie from the oven. We do our cuts on the cheaper peel, but never on the good one. A nicked-up, cut-on peel makes it difficult to slide (or toss) the pie onto the stone. So, don't cut on your peel or buy two as we did. |
|
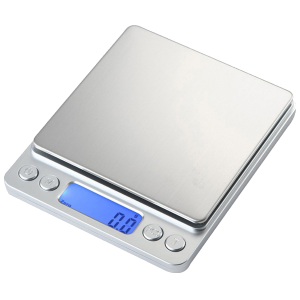
Baking Scale (Cost: $10-20)The scale needs to be accurate to 0.1 gram (0.01 oz) or better. I use the European CGS system as do most of the pizza die-hards. A top end of 1000 grams is all you'll ever need unless you are into commmercial baking. Amazon currently offers one from DDSKY Direct with a 2000 gram capacity and 0.1 gram resolution for just $13 delivered to your door. Last time I visited WalMart (which ain't often) they had a suitable scale for $20. They are easy to find nowadays. |
|
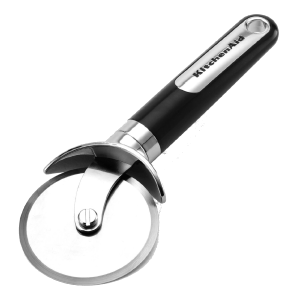
Pizza Wheel/Cutter (Cost: $5-10)If you don't already own one of these you are probably on this page by accident. But, equipment is equipment so I'm listing it as essential. By the way, I've tried the rocker knives and other cutters but keep coming back to the wheel. They work, period. |
|
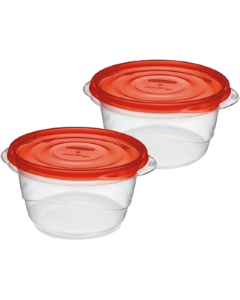
Containers/Incidentals (Cost: $10-15)Finally, you'll need a few sealable containers, plastic wrap, bowls, spatulas, and other kitchen miscellany. The most important is a suitable "dough bucket" similar to those pictured. A dough bucket is a sealable container about 1-1/2 quart size used to store the dough during retarded ferment. It's easiest if the container is round and slightly larger than twice the original dough ball size. |